Thursday, January 27, 2011

How to Add a Commenting System in Joomla

Using the 'Disqus Plugin for Joomla' by JoomlaWorks. It's a free plugin that allows visitors to comment in articles and/or menu items using the popular Disqus Comment System.
             
  • Step-01: Go to  Disqus.com and sign up for a free account.
  • Step-02: Go to JoomlaWorks.gr and download the Disqus for Joomla plugin.
  • Step-03: Now login to your admin panel. Go to Extensions >> Install / Uninstall and upload the file.
  • Step-04: In the admin panel, go to Extensions >> Plugin Manager >> Disqus Comment System for Joomla! (by JoomlaWorks), and add your Disqus subdomain name to the Plugin Paramters (this will be the name you added to the 'short name' field when you set up your Disqus account), assign the categories/menu items you would like to allow comments in, and enable the plugin.
  • Step-05: Start adding comments to your site!
Monday, January 24, 2011

How to create template for joomla

create a file called index.php, and another named templateDetails.xml. Then create a folder
named css and in it - a new file name template.css

index.php - Specifies the available module positions and the path to your Stylesheet file. This is the main "section" of your
 template;

templateDetails.xml - This is a system file that provides information about your template to the Joomla application;

css/template.css - The stylesheet file of your template. It defines the looks of your website;

The index.php file should start with:

       <?php 
       // no direct access
       defined( '_JEXEC' ) or die( 'Restricted access' );?>
       <!DOCTYPE html PUBLIC "-//W3C//DTD XHTML 1.0 Transitional//EN" "http://www.w3.org/TR/xhtml1/DTD/xhtml1-transitional.dtd">
       <html xmlns="http://www.w3.org/1999/xhtml" xml:lang="<?php echo $this->language; ?>" lang="<?php echo $this->language; ?>" >
       <head>
       <jdoc:include type="head" />
       <link rel="stylesheet" href="<?php echo $this->baseurl ;?>/templates/system/css/system.css" type="text/css" />
       <link rel="stylesheet" href="<?php echo $this->baseurl ;?>/templates/system/css/general.css" type="text/css" />
       <link rel="stylesheet" href="<?php echo $this->baseurl ;?>/templates/<?php echo $this->template ;?>/css/default.css" type="text/css" />
       </head>


Next, we have to add the "body" part of your website:
 
       <body> 
       <jdoc:include type="component" /> 
       </body>

This page includes only your articles without any styling or modules displayed. Now, let's add some module positions. Edit your
index.php file and change the lines between <body> and </body> to:

<div id="container"> 
    <div id="header"> <jdoc:include type="modules" name="top" /> </div>   
    <div id="sidebar_left" class="float"> <jdoc:include type="modules" name="left" /> </div> 
    <div id="content" class="float"> <jdoc:include type="component" /></div> 
    <div id="sidebar_right"class="float"> <jdoc:include type="modules" name="right" /> </div>  
    <div id="footer" class="clear"> <jdoc:include type="modules" name="footer" /> </div> 
</div> 


The <jdoc:include type="modules" name="left" /> line tells the Joomla application where to insert the modules
published in the "left" position. We have just added the top, left, right and footer positions to your template.


Note that we have surrounded those in <div> tags and added information about their classes and ID's. In addition, we have
wrapped everything in a div with ID "container" which allows us to set the basic dimensions of your page. The div classes will
be defined in the template.css file once we create it. At this point, however, your index.php should look like this:


Now we have to edit the templateDetails.xml file. In it, paste the following lines:


        <?xml version="1.0" encoding="utf-8"?>
<!DOCTYPE install PUBLIC "-//Joomla! 1.5//DTD template 1.0//EN" "http://dev.joomla.org/xml/1.5/template-install.dtd">
<install version="1.5" type="template">
         <name>tutorial_template</name>
         <creationDate>02/2011</creationDate>
         <author>Somehowblog11</author>
         <authorEmail>janina@yahoo.com</authorEmail>
         <authorUrl>http://www.somehowblog11.blogspot.com</authorUrl>
         <copyright>somehowblog11</copyright>
         <license>AMI</license>
         <version>1.0.0</version>
         <description>Basic Joomla Template</description>
         <files>
                 <filename>index.php</filename>
                 <filename>templateDetails.xml</filename>
                 <filename>css/template.css</filename>
         </files>
         <positions>
                 <position>left</position>
                 <position>right</position>
                 <position>top</position>
                 <position>footer</position>
         </positions>
</install>


Let's take a more detailed look on the lines of the templateDetails.xml file:

<install version="1.5" type="template">  It will allow the Joomla template installer to correctly install your template if you decide to make an archive of the template and use it on a different Joomla instance.
<name>tutorial_template</name> - This line defines the name of your template. For the purpose of this tutorial, we are using "tutorial_template";
<creationDate>02/2011</creationDate> - This line displays the creation date of your template;
<author>somehowblog11</author> - This line defines the author of the template;
<authorEmail>janina@yahoo.com</authorEmail> - Add your e-mail in this line;
<authorUrl>http://www.somehowblog11.blogspot.com</authorUrl> - This line specifies the website of the template creator;
<copyright>somehowblog11</copyright> - You should add the copyright information for your template in this line;
<license>AMI</license> - This line specifies the type of license your template is published under;
<version>1.0.0</version> - This line defines the version of your template;
<description>Basic Joomla Template</description> - Here you can add additional information for your template;
<files>
   <filename>index.php</filename>
   <filename>templateDetails.xml</filename>
   <filename>css/template.css</filename>
</files> - Those lines specify all the files that your template uses.
<positions>
   <position>left</position>
   <position>right</position>
   <position>top</position>
   <position>footer</position>
</positions> - Those lines define the positions you have enabled in your template.

How to add/change joomla logo

Joomla gives builtin three template.Templates are belong inside xampp/htdocs/(joom package name)/templates.
They are beez,ja_purity,rhuk_milkyway.Here joomla use own logo.But if u edit the anyone template for displaying your
own logo.
    
       Step-01:Make your logo using photoshop or other graphics software.
Define the logo size carefully.copy the logo and paste in C:\xampp\htdocs\joomla1.5\templates\rhuk_milkyway\images
Here show that suppose you install xampp in C:\ drive. and joomla1.5 is package you install and rhuk_milkyway is
the template name.

       Step-02:Login to the joomla back-end.

       Step-03:Go to Extensions.Then go to Template Manager.Select a Default template.Click edit.
      
       Step-04:Edit css and you can see some css file to editable.

       Step-05:From here select template.css and find the logo which is used in "rhuk_milkyway"
and here write your logo name.
      
       Step-06: Save it and refresh your browser then see logo in your site.

How to add favicon in joomla

         01. 16x16 pixel image is called favicon. It is webpage standard.To make favicon for joomla use graphics software such as  photoshop,Gimp or Windows Paint or an online tool such as http://antifavicon.com/

         02. Convert to ico format using free online sites such as:
         03. Copy the file to the xampp or wamp/joomla/templates/<your template> directory and name it favicon.ico.   paste here. And refresh the browser.

Sunday, January 23, 2011

How to setup XAMPP for Joomla

For set up joomla first need to install server in which joomla can run. XAMPP setup is the easiest way to make server. So let's start........

         1. Download the windows latest version XAMPP installer from here
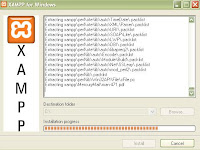
         2. After downloading extract it in any drive. Suppose c:\ drive. see figure(01)
         3. Now XAMPP setup is complete.
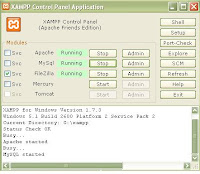
         4. To test for successful installation, go to c:\xampp and click on XAMPP control.exe. Start the MySql & Apache like in figure(02). Then open any browser and write localhost. If  installation is successful then you can see a window like figure(03).
Fig 01

Fig 02

Fig 03

How to add article in joomla

1.Log into your admin control panel for Joomla see fig(01). In the typical Joomla installation, this is done by pointing your web browser to “yourwebsite.com/administrator/”. When you enter the user name and password that you established for the web site’s Administrator at the time that Joomla was installed on the server.

                           2.Look for the "Add Article" button.Click on "Add article" fig(02)

                           3.On the article composition screen, start by entering the title to your article at the top. There is also a location for an “alias”, or alternate title.Select is the article publish? fig(03)
                           4.Type something text that starts the article. After the article is finished, this intro text will be displayed on the web site, along with a “Read More” button that takes visitors to the full article. So make your intro text a short summary or overview of the article.
                                                 
                            5. After you have entered your intro text, scroll down and click the button marked “Read More”. You will now see a red line appear under the intro text. This marks where the “read more” cut off point is located.

                           6.Write the remaining text under the red line. This is the main body of your article. Whatever you type here will not be visible to your web site visitors until they click the “Read More” button and are taken to the full version of the article.

                           7.Look on the right side of the screen for information about the Author. You can either select a registered member of your site from the pull down menu, or type the name of an Author Alias to attribute the article to. This step is not mandatory, but if you skip this step the site will say that the author is “Administrator”. This is fine for some people, but others feel that it looks more professional to use a person’s name as the author of the article.

                            8.Click the save button at the top of the screen. Once you click this button, the article will be published to your web site.

                             9.If you need to make changes to your article, you can do by way of the Article Manager. You can get to the Article Manager by clicking the article manager button on the main screen of the admin control panel, or by clicking the “Content” link in the navigation menu, then selecting “Article Manager” fig(04).
Fig 01

Fig 02

Fig 03

Fig 04
For installing joomla first need to download the joomla package. To download joomla click here link
After download extract it and rename the folder as like as you choose. Let give the folder name "myjoomla".
Now cut the "myjoomla" folder and paste into c:/xampp/htdocs folder. Open a browser and write localhost/myjoomla. Press enter... Give Username and Password Fig(01)

                                     There are seven step to complete the joomla installation process.
                  Step-1: Language:  choice your language.click next button.
          
                  Step-2: Pre-installation Check: Here nothing to configure. So click next
           
                  Step-3: License: Here nothing to configure. So click next button.
           
                  Step-4: Database: Here fill out the blanks with appropriate settings like below and see fig(02)
                            Database Type: MySql.If you use another database then select that.
                            Host Name: localhost. Because you install joomla in your PC.
                             Password: As your wish. But now i don't give password.
                             Database Name: joomlatutorial. This is created in XAMPP for database.
                   Step-5: FTP Configuration: No need to change anything. Skip it and click next and see fig(03)

                   Step-6: Configuration: Here fill out the blanks with appropriate settings like below and see fig(04)
                                                        Site Name: As your wish. Suppose i give here "Beginner joomla tutorial"
                                                      Your Email: Give your valid email address.
                                     
                                              Admin Password: xxxxxxx
                                              Confirm Admin Password: xxxxxxx
                                       

  Now in same page if you click on "Install Sample Data" button,can see demo web-page after install joomla. If not click you can't see.Now click next.

                  Step-7: Finish:  First delete the "installation" folder from c:/xampp/htdocs/myjoomla. And click on "Site" button to see your web-page. Or click on "Admin" button to make change your website. See fig(05)
Fig 01: Admin panel

Fig 02: Database

Fig 03: FTP Configaration

Fig 04: Configaration

Fig 05: Finish installation